Whilst it’s sunny, get outside and get creative. I want to see who can make the most colourful, summer-inspired pattern, using the tie-dying technique. My two girls (Lily and Grace) have had a go with some old white P.E t-shirts and pillowcases. So let’s see how they got on, and more importantly, how to do it…
Tie Dye Art
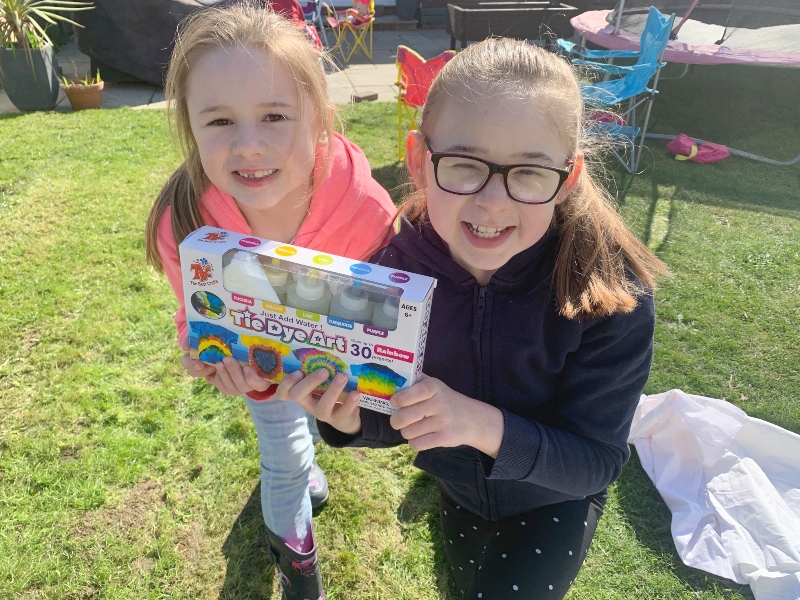
Firstly, get some dye and the items that you wish to tie-dye – I bought a tie-dye kit from a popular online retailer (Amazon). It contained everything we needed; dye, squeezy bottles, plastic gloves, rubber bands, spare dye sachets (for another day) and instructions. We also You-Tubed clips before-hand to make sure we knew what we were doing.
Choose your pattern
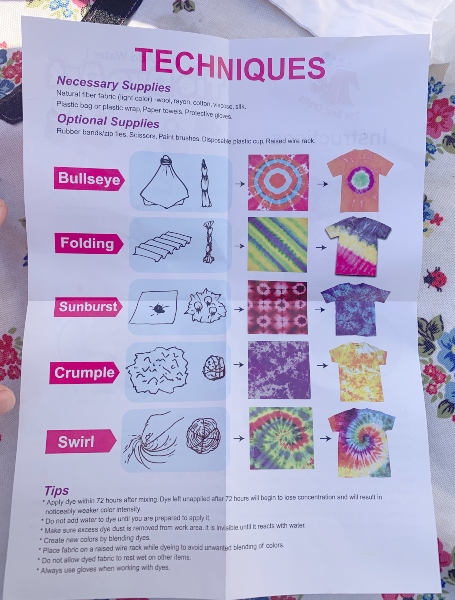
Next, decide which pattern you are going to create. We went for the spiral design for the t-shirts and a striped pattern for the pillowcases.
If you choose to create a spiral pattern, you will need to pinch the middle of your t-shirt with your thumb and index finger and begin to twist the t-shirt round in a clockwise motion. Until your t-shirt looks a little bit like a rose. Once you have this shape, use elastic bands to secure it. Remember to start with one band around the edge of your t-shirt, then make a star shape with the remaining bands. This will help later when putting on the dye.
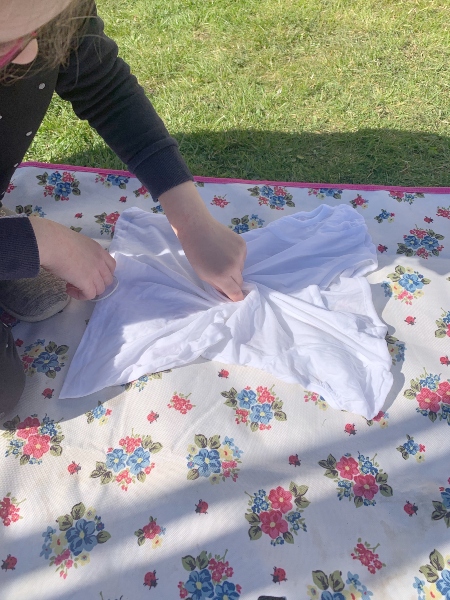
If you choose to make a striped pattern, fold the item into a sausage shape and then evenly space elastic bands around it.
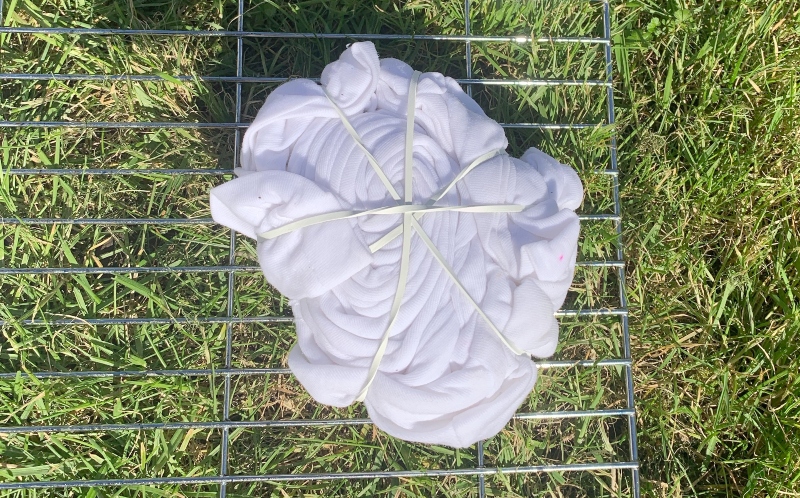
Grace looks like an old lady in this picture. I thought it was too funny not to share.
How to Tie Dye
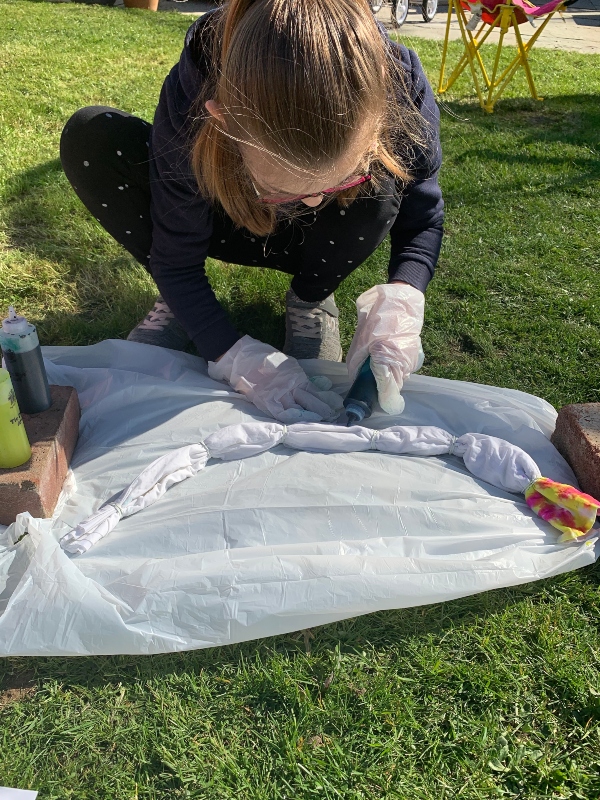
Now you are ready to start dying. Mix the dye with some cold water, give it a good shake and then you are ready to go. You can colour in each section using a different colour, use a single colour, or just go crazy and splatter little bits of dye in random parts. Just try not to let the colours get too close to each other, unless you are trying to mix them.
Top Tie Dye Tips
- Be careful as this dye will stain the clothes you are wearing, so make sure you are wearing old clothes and shoes (preferably wellies).
- Wear the gloves provided in the kit or some washing up gloves to protect your hands.
- Make sure you have saturated the material but don’t overdo it as otherwise, the colours will run into each other later on.
- Use the squeezy bottles to get into all of the little folds as much as you can.
- Mix the dye colours to make new colours.
Once you are happy with your creation, wrap it in cling film or put it in a plastic bag and leave for the dye to soak in. You must leave it for at least 6-8 hours. (We left ours overnight.)
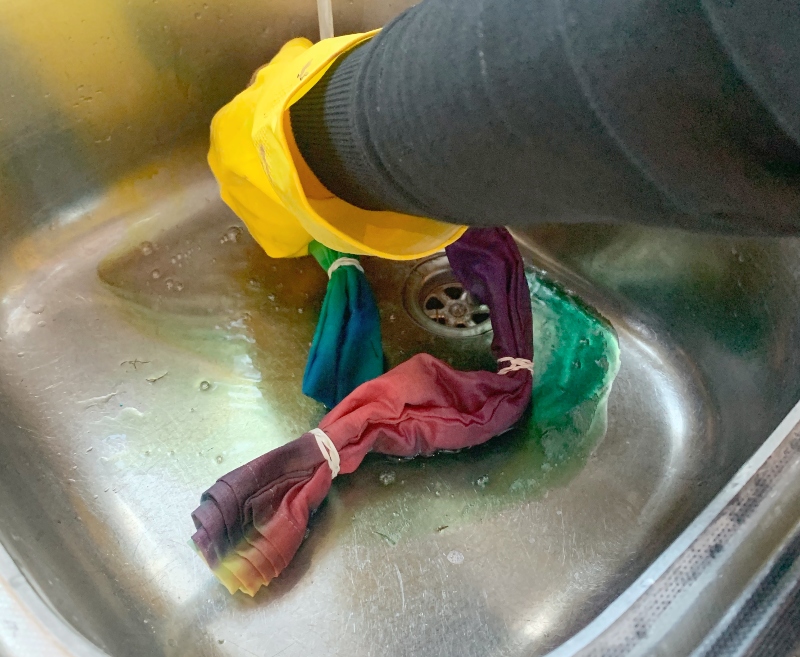
Once ready, remove the elastic bands and wash your items under some cold water in a sink until it runs clear.
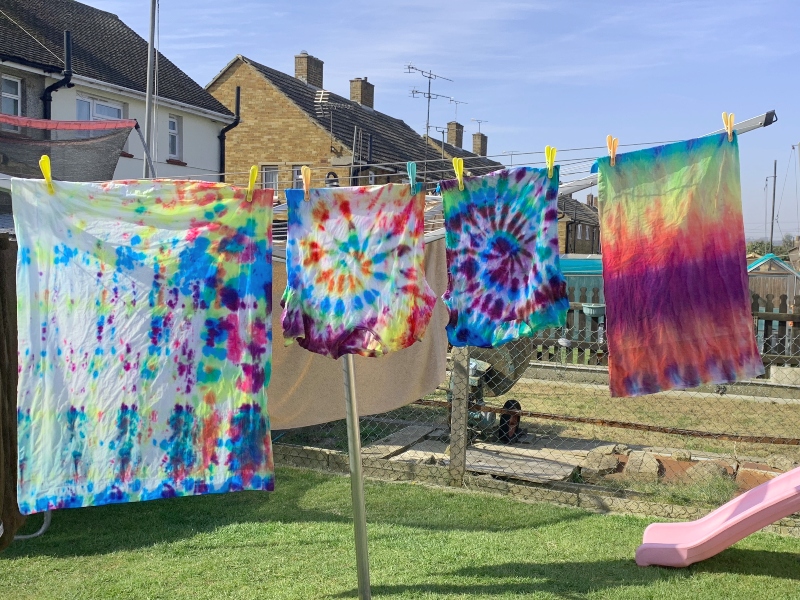
Lastly, give your items one final wash in the washing machine (on their own as the colours might still run) and hang them on the line to dry or show off to the world.
Have fun, Mrs Bellars
All images belong to Mrs Bellars


Hi Mrs Weekes! It’s Caiden From Your Old Class. I hope everything’s going good for you and your class! Enjoy your summer holiday! 🙂